TECHNIQUES
AND TIPS
Discover everything you need to know about crafting cosplay with EVA foam—from essential techniques to practical tips and step-by-step guidance. Whether you’re a beginner or an experienced foam artist, this guide will help you bring your creations to life.
WORKING WITH EVA
FOAM
Foam Cutting
Use a sharp craft knife or utility blade for clean, precise cuts. Dull blades can tear the foam, so replace them often. For straight cuts, use a metal ruler as a guide. When cutting curves, move the foam instead of the knife for smoother edges. If the edges are rough, lightly sand or heat-seal them with a heat gun.
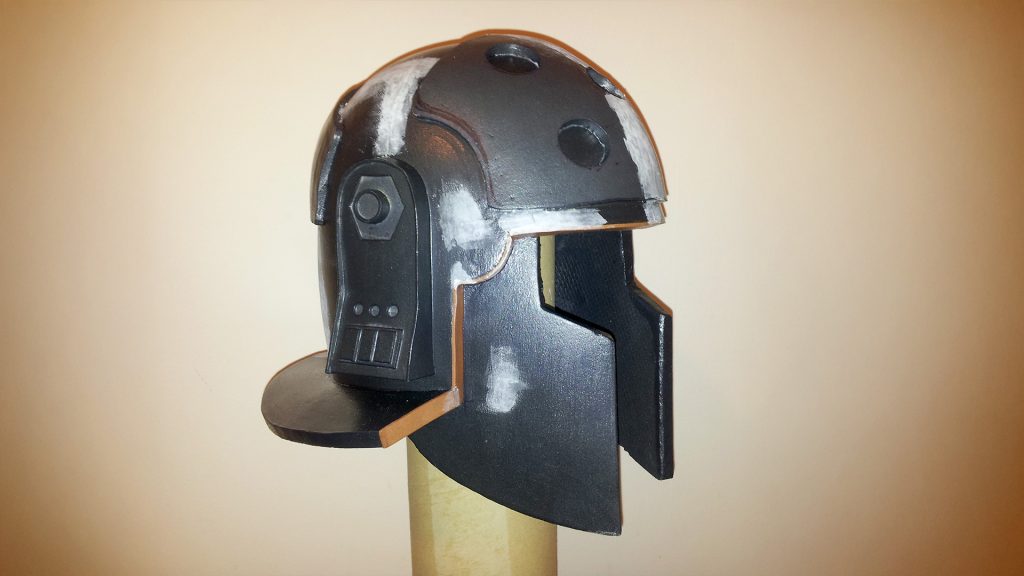
Heat Shaping
A heat gun is essential for shaping EVA foam. Gently heat the foam until it becomes flexible, then bend and hold it in place until it cools. To create compound curves, heat the foam and press it over a rounded surface, such as a ball or a pipe. Be careful not to overheat, as this can cause burning or warping. Once shaped, the foam will hold its new form, making it perfect for helmets, armor, and curved props.
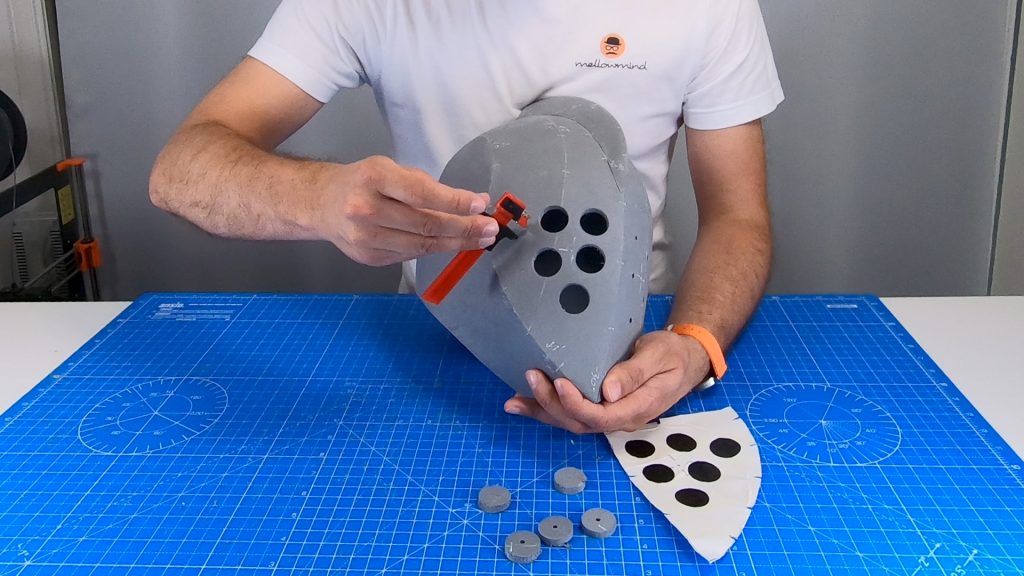
Detailing & Engraving
To add details, use a rotary tool, engraving tool, or soldering iron to carve patterns, grooves, or decorative etchings into EVA foam. Lightly heat the foam afterward to smooth out rough edges. For subtle details, pressing a heated blunt object (such as a spoon or a sculpting tool) into the foam can create indentations without cutting. Always test techniques on scrap foam first to perfect your design.
BUILDING
AND ADDING
Gluing & Adhesives
For strong, seamless bonds, contact cement is the best adhesive for EVA foam. Apply a thin, even layer to both surfaces, let it dry until tacky, then press them together for an instant, durable hold. Hot glue works for quick fixes but it can create bulky seams. For smaller details or flexible parts, super glue is a great option. Always work in a well-ventilated area when using strong adhesives and align pieces carefully—contact cement bonds instantly!
Layering & Reinforcement
Building up layers adds depth and strength to foam projects. Use thinner foam sheets (2mm-4mm) for details and thicker foam (5mm-10mm) for the base structure. To reinforce large or delicate pieces, sandwich thermoplastic, wire, or Worbla between foam layers for extra durability. Avoid bulky seams by beveling the edges before gluing layers together.
Attaching Straps & Fasteners
To keep your armor secure and comfortable, use Velcro, elastic, buckles, or nylon straps. Velcro is great for adjustable attachments, while elastic bands allow some flexibility for movement. For heavier armor pieces, side-release buckles or parachute clips work best. Reinforce attachment points with extra foam layers or a small piece of fabric to prevent tearing.
Adding 3D Details
Make your props and armor stand out with extra details! Foam clay, thin foam sheets, and 3D-printed parts can be layered on for intricate designs. Use raised patterns, rivets, and decorative trim to enhance the look. For fabric elements like capes or straps, attach them securely with glue or sewn-in loops for added durability.
MISTAKES AND BEST OF
PRACTICE
Fixing Mistakes
Made a wrong cut? No problem! Contact cement or super glue can bond foam back together seamlessly. Gaps or uneven seams can be filled with foam clay or flexible fillers like Kwik Seal. For dents or marks, use heat to gently expand the foam back into shape. Mistakes happen—turn them into creative design elements!
Filling Gaps & Seams
For seamless builds, use foam clay, Kwik Seal, or flexible putty to fill small gaps and cracks. Apply with a fingertip or tool, smooth it out, and let it dry before sanding. For large seams, reinforce the inside with a thin strip of foam before sealing. Lightly heating seams after sanding can help blend them further for a flawless finish.
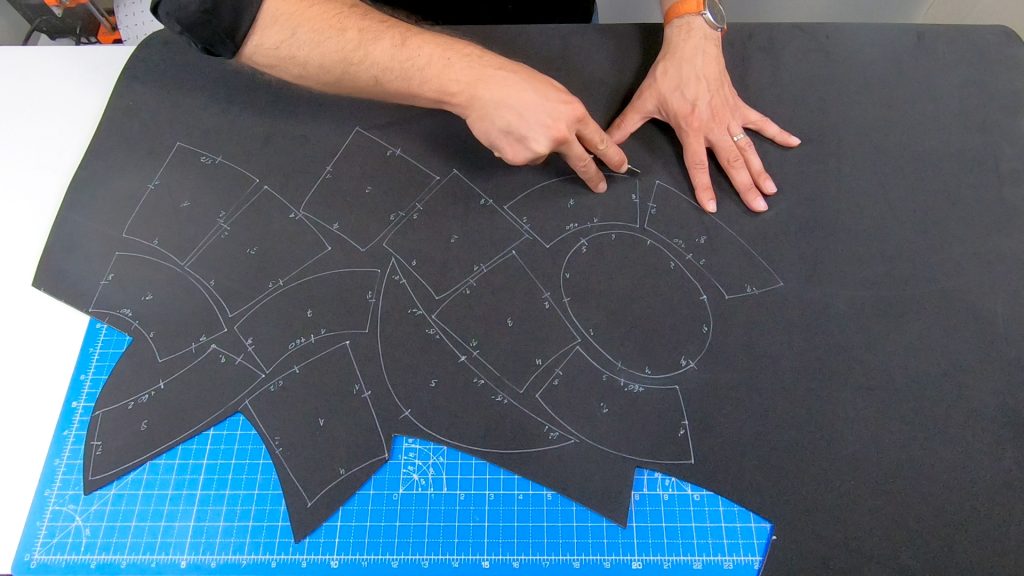
Minimising Waste
Plan your cuts efficiently to get the most out of your foam sheets. Arrange pattern pieces close together, and save scrap pieces for future small details, layering, or testing techniques. Small foam scraps can be used as spacers, padding, or texture stamps.
Fixing Mistakes
Having the right tools makes all the difference, especially if you want to craft with ease and achieve stunning results. And the good thing is that you only need a few basic tools to get started!
FAQ
Got questions? Check out the frequently asked questions below for answers
to common problems and how-tos.
to common problems and how-tos.
How to scale the pattern to my head size?
All our helmet patterns are scaled to fit an average adult head: circumference approx. 57-59 cm (21-22 in). If you need a larger or a smaller size, please refer to the 'Head size and printing scale' PDF that comes with your digital download - it provides you with a helpful table with sizes and more info on how to scale it accordingly.